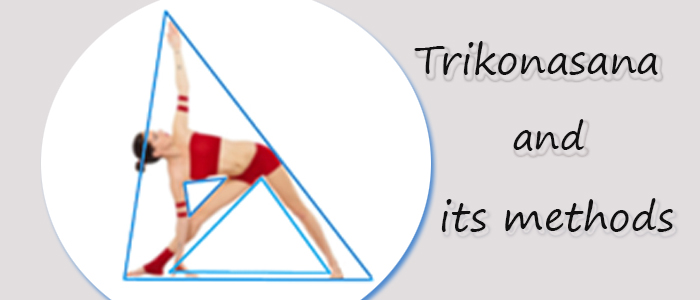
Triangle Pose or Trikonasana and it's method how to do step by step, and benefits of trikonasana in our life.
'Tri' means three, 'Kona' means angle. Thus, Trikona asana means Triangle pose.
Utthita - Extended or Standing
Trikonasa or Trinagle pose is a standing, side-bending, balancing, stretching, gentle strengthening, and beginner kind of pose. It is one of the fundamental and basic poses.
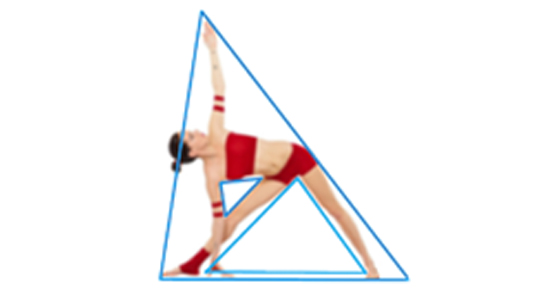
Method – step-by-step explanation
Foundation of the pose or Taking Gap between legs
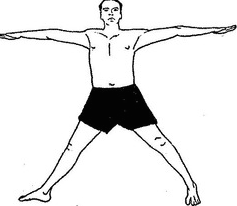
Come out of Tadasana and jump and pull your feet apart with arms on sides in Utthita Hasta Padasana.
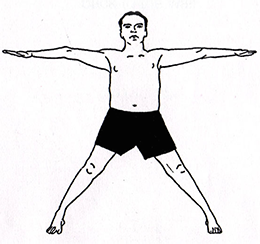
Distance between your feet should be sufficient. Energy of the outer part of your legs will escape if there is too much distance between your feet. On the other hand, if your feet are too close, the energy of your inner legs will be lost. You won't be able to engross your quadriceps muscles if your posture is too wide. Meanwhile, the mobility will be reduced in your hips and spine if the gap is too less. Based on your flexibility in the hips and the amount of force you feel in your legs, you will be able to judge a good distance in a few months.
Be Conscious of Back Part of The Body while Jumping?
When you jump in or out, it should be synchronised with inhalation and exhalation. Don't jump if you have knee pain or back pain. See to it that your jumping action comes from back part of the body. For this, you must think and act intelligently from the back part of your body. Most of the time we express ourselves from the front side of our body as that is where maximum of our intelligence is and that's why we move from there. When we talk to people, we do so from the front, as at that time we are expressing our self to them. When we are facing someone, we see that person from the front and adjust our eyes accordingly but we can’t do the same for the back part as we can't see it. It is due to this reason that we completely ignore the back part of our body. Yoga includes the whole body and front as well as back parts of the body are considered as equally important. You can feel subtle consciousness when you try to feel that you are jumping from the back part of your body while jumping in standing pose.
Keep Tadasana or straight your every part of body?
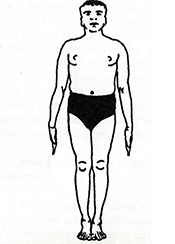
You must pause for a minute while doing Uthita Hasta Padasana, and feel and observe the change that took place in your body. Despite having spent some time in Tadasana, one forgets the actions of Tadasana before jumping with feet apart as it is human tendency and very natural. You must seek Tadasana in every part of your body even after jumping with feet apart. You must level your hips and see to it that none of them is higher than the other. Even your feet should be turned equally outward instead of one being turned more outward than the other. You must lift your inner legs upwards towards pelvis and squeeze and move your outer legs inwards while being in Utthita Hasta Padasana. You must fold your tailbone beneath and lift your thighs and knee-caps, similar to that done in Tadasana. Now you must strive for Tadasana in your chest .You must extend your chest fully from the center three diamentionally and equally in all dierction of the chest. Now move the frontal part of your chest skywards, over the shoulders, going down your back similar to the position of waterfall. You must repeat these actions during transition phase from one asana to another.
Increase stamina through Utthita Hasta Padasana?
While practicing Utthita Hasta Padasana, you must ensure that your triceps are engaged upwards into the humerus bones, while lifting your arms from underneath your arms while holding your arms to sides for longer duration. Your trapezius muscles should be downwards so that you can increase the time of holding your arms, resulting in increasing your stamina. In order to open your chest, you must press down your elbows with open palms. Your thumbs should be stretched in such a way that your little finger should be connected to backside of your chest, middle finger with mid-portion of chest, and thumb with frontal side of your chest.
Now turn your feet to the side in Parsva Hasta Padasana. While turning your front foot outwards to 90º on the side, you must turn your entire leg to the side and not just your foot and lower leg. Your front leg should be turned in such a way that your thigh should turn to the side in the direction of your foot. Your front heal should be in alignment with your ipsilateral bone (middile of other foot).
Your front foot's 2nd toe should be at 90º to the side. In case of knee problem, you must turn your front foot as well as your knee to outwards. Your problematic knee has to be your front knee during this pose but it should not hyperbend. Your feet should be aligned in such a way, that if a line is drawn from the front heal, then it should intersect your rear foot in the mid-part. It's fine if you keep your heals aligned on the same line during early stages of this asana, as it helps in maintaining balance and in keeping your front foot pressed down strongly towards the floor. It should be noted that those who have broad hips or upper hip is moving backward, will have to do heal to heal alignment instead of aligning heal to arch in most of the standing general poses. In case of expecting mothers/women, the stance has to be wider and more space will be needed for it. You must open your toes to maximum and stretch them without grasping the floor while being in Tadasana.
Solving physical problems through Parsva Hasta Padasana
In order to seek Tadasana, you need to solve multiple problems while practicing Parsva Hasta Padasana. You will observe that the knee of your front leg which was turned at 90° outwards, now slumps inward as a result of your thigh dropping inwards. Much efforts will have to be made to move your inner knee in the direction of your outer thigh while strongly turning your front thigh outwards. You will find that despite putting a lot of efforts, you won’t be able to do it enough. This is because of turning the knee, especially the upper thigh at 90° on the side, facing your foot. You must keep turning it to the outer side until you reach the perfect position. You must bring your outer ankle inwards in the direction of inner ankle in order to stay on the inner side of your front foot. This will happen as people doing yoga have the tendency to move to the outer side of the body. You must move your outer thigh inwards in such a way so that the weight of your body should be more on the inner side of your front foot. Avoid falling on the outer side of your front foot. You must remain on the inner edge of your front foot while bringing outer thigh and outer calf inwards, towards your mid-line. Now adjust your front leg and let it come to the inner part of your front foot. It should come on your inner heal and should not be leaning out. The outer edge of your rear foot should be pressed down to the mat. During this time, you must not come on the inner edge of your rear foot.
Transition from Parsva Hasta Padasana to Tadasana to Trikonasana
While practicing Parsva Hasta Padasana, a tendency develops that you automatically tilt your pelvis towards your front leg while turning your feet and legs. Despite being in transition, you must go for Tadasana by levelling your torso and pelvis and continue to lift up your chest and side-ribs. Now turn back your torso and keep it squared to the front wall and away from your front foot. There is a different type of action for beginners in which shoulders are twisted back and away from the front foot. There is another action for intermediate practioners in which one twists back from floating ribs with front knee to the outer side.
Those who are practicing advanced stages of yoga can try advanced action in which rear-sided abdominal muscles (naval area) are taken back while upper front things are kept out. In other words, you must turn away from your belly with torso facing square forward. You must not go to Trikonasana until you have achieved the above mentioned positions.
Now you must create an anchor on the outer side of your rear foot before moving into Trikonasana. You must maintain this pose and exhale while going down with lowered torso. Inhale when you return to the standing pose.
Movement of the legs and feet
The weight of your body should be equally distributed between the inside edge and the outside edge of your front and rear foots while being in Trikonasana. Your weight should be divided between your feet in such a way that your each foot should bear equal weight on front of heal and rear of your foot, similar to that as in all standing poses. You must put complete weight of back leg and hip to push the outer part of your back foot. Ensure that the big toe of your front foot should be pressed down to the floor as we humans have tendency to roll to the outer side of the front foot. If you are comfortable then slightly turn your foot outward.
In case you feel like moving one of your feet, always move your rare foot if you feel like correcting your stance while in this pose, as it is hard to move the front foot. If you have a problem in keeping stable to balance your body then you can move your rear foot inward to assist yourself.
Your current position in which your pelvis is rotated sideward, almost close to plane of the leg, is one of the 3 main asymmetric wide-legged standing position. (Parsvakonasana and Virabhadrasana II are the other 2 asymmetrical positions). Yoga practitioners have a tendency to let the rear thing and knee move forward while the rear hip falls inside. In order to keep your rear knee rotating upwards towards the roof in all the above poses, you must resist it with a strong backward action in rear hip, thigh and knee. Now move your rear groin away from your front one and take your rear thigh and bone towards back of the leg. Throughout this pose, you must strongly pull back your inner thigh, rear hip and knee and hold them there. Your back foot’s outer edge shouldn’t come off the floor and should instead be pressed down. Now press down the outer edge of your rear foot, drawing up on rear outer ankle as you establish and maintain Tadasana.
3 Vital actions of Trikonasana
Three vital actions of rear leg in Trikonasana are: 1.) Inner ankle presses outer edge of the foot while moving towards outer ankle. 2.) the thigh revolves upward and outward and 3.) The outer thigh is lifted by the inner thigh while keeping it up and away from the ground. All 3 above mentioned actions are used to keep the rear foot pressed down on the ground.
Instead of keeping your front thigh relaxed, rotate it inward. You can counter this by strongly contracting your front butts and external hip-turners so you can rotate your front thigh. This way you can centre your knee, thigh and shin directly in a centre-aligned position of your front foot. While doing so, your front foot shouldn’t fall down and you must keep your weight balanced evenly across the sole of your front foot, while turning your front leg towards outer side. Now lift up your front foot towards your front hip and bring it to the inner side of your inner ankle. Now remain steady and press down the inner part of your front foot, stretch and pull up in the line diagonal to your front big toe, moving up within your outer front hip. Though a bit difficult, but this action helps in rotating your front thigh.
After subtly performing all above actions mentioned in the above paragraph, you will notice that your intelligence lies in the outer part of your front leg, and that you must bring it in to touch the inner part of your front leg. If you feel like lengthening your inner front leg then you must feel that you are using your outer thigh to touch and lift up your inner front thigh. You will be able to understand more easily about the actions of pelvis and hips, after reading the below paragraph.
Important actions of Pelvis and Hips
Now turn your knees and thighs outward and away from each other in such a way that as if you are feel like opening on the outer side towards legs from your pelvis. If you broaden your pelvis as much as you can, then it will help your action, which in-turn will help you to increase the size of your pelvis. It is very essential to employ your leg muscles strongly to your bones, similar to all standing poses. See to it that your leg muscles should be hugging from all sides. Now squeeze the skin and muscles of your thighs to help lift up your kneecaps in the direction of your groins. You must keep refreshing this action by pulling your kneecaps, every time after they fall. You can get to tighten up your torso forward at the groin, particularly by taking the skin of your forward thigh, straight into the hip on side. Try drawing them strongly into your knees in addition to lifting your knees.
You will feel as if your thigh-skin is drawing strongly into your femur, thigh bones and all the way to the back portion of both sides of your legs. Spread out your skin at the back of your knees and allow broadening the back part of your legs. Doing this pose will strongly expand the muscles of your frontal hamstring. You aren’t utilizing your muscles enough if you aren’t feeling every part of your leg in various standing poses. You must remain aware during these poses for which you must increase your consciousness in every pose by feeling it thoroughly. You must fold your sacral vertebra beneath, despite drawing your thighs strongly into the back part of your legs. This is one of the common positions of Tadasana in standing position.
Just don’t rest by hanging out on your front leg. Now lift your entire leg up to your hip and lift the skin on the back of your thighs and hamstring, in the direction of your butts, similar to almost all other standing positions. Next, equally raise the inner and outer sides of your knees. During this time, the muscles of your legs must be moving in and skywards, giving the feeling of expanding and spreading your bones outwards. Same process is applicable for your arms too.